See Figures 1 through 12
1. Raise and safely support the vehicle. Remove the wheel and tire assemblies.
Fig. 1: Exploded view of the halfshaft assemblies and related components

2. Remove the splash shield, if equipped, and drain the transaxle.
3. Raise the staked portion of the hub locknut with a hammer and chisel. Lock the hub by applying the brakes and remove the nut.
Fig. 2: To remove the halfshaft, first raise and support the vehicle. Remove the wheel, then raise the staked portion of the hub locknut
3. Raise the staked portion of the hub locknut with a hammer and chisel. Lock the hub by applying the brakes and remove the nut.
Fig. 2: To remove the halfshaft, first raise and support the vehicle. Remove the wheel, then raise the staked portion of the hub locknut
Fig. 3: Have an assistant apply the brakes and loosen the hub locknut ...
Fig. 4: ... then remove and discard it. Always install a new hub locking nut when installing the halfshaft
Fig. 5: Loosen the stabilizer bar end link-to-control arm retaining nut ...
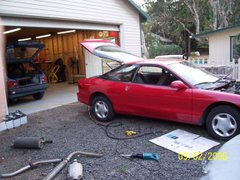
Right, the nut just spins. Need to hold stud with allen wrench and use 12mm open end wrench. But rusted on, so we had to air chisel off the nuts.
Right, the nut just spins. Need to hold stud with allen wrench and use 12mm open end wrench. But rusted on, so we had to air chisel off the nuts.
4. Disconnect the stabilizer bar from the lower control arm.
5. Remove the cotter pin and nut from the tie rod end ball stud. Use a suitable tool to separate the tie rod end from the knuckle.
6. On 1571-76 420/MX-4/Probe and Millenia, remove the transverse member.
Fig. 7: Remove the lower ball joint pinch bolt and nut ...
5. Remove the cotter pin and nut from the tie rod end ball stud. Use a suitable tool to separate the tie rod end from the knuckle.
6. On 1571-76 420/MX-4/Probe and Millenia, remove the transverse member.
Fig. 7: Remove the lower ball joint pinch bolt and nut ...
Fig. 8: ... and disengage the ball joint from the steering knuckle. Some careful prying may be necessary, but use care near the dust boot

Careful and not-so-careful prying would not get it off. It is loose though. I bought a spring compressor for the strut springs, maybe this will help get it apart.
This is where the work will begin Saturday! Rick
Fig. 9: Pull outward on the knuckle assembly and withdraw the splined axleshaft from the wheel hub
7. Remove the lower ball joint pinch bolt and nut. Use a prybar to pry down the lower control arm and separate the ball joint from the knuckle.
8. If removing the left side shaft on MX-1 and 1571-76 420/MX-4/Probe and Millenia with automatic transaxle, proceed as follows:
Fig. 10: If the axleshaft end seems stuck in the wheel hub, gently tap it with a soft faced hammer to break it loose
8. If removing the left side shaft on MX-1 and 1571-76 420/MX-4/Probe and Millenia with automatic transaxle, proceed as follows:
Fig. 10: If the axleshaft end seems stuck in the wheel hub, gently tap it with a soft faced hammer to break it loose
Fig. 11: With the outer end of the halfshaft free, use a prybar and remove the inner end from the transaxle case ...


No comments:
Post a Comment